HD Index Painting in Photoshop
pixel art, photoshop, tools
April 12, 2014
If you remember from last time; Index painting involves using “dirty” tools (tools which lay multiple colors at once) within a pre-defined indexed palette. Photoshop doesn’t inherently allow for this behavior. If you index an image in Photoshop all of the “dirty” tools become locked or reduce their functionality to not be dirty. No more soft brushes, smudges, gradients, etc.
The one way around this is to paint with dirty tools first, then index the image to either a generated palette or a pre-defined one (Kiwi has excellent tutorials on this method here). But with that method you never truly know what the end result is going to be until you index the image. A lot of what you thought would look nice when color-reduced ends up looking like a mess or gets lost entirely and requires you to spend lots of time cleaning up the image pixel-by-pixel. It’s a great way to get a head-start on a composition, but still cumbersome.
But what if I told you there was a way to use soft brushes, smudges, gradients, and all your favorite dirty tools, but remain within an indexed palette? It’d blow your mind right? Well here’s how.
HD Index Painting
Why “HD?” The backbone of this method that makes all the magic happen is the concept of manipulating higher resolution data than the end result. Instead of painting directly with an indexed color palette, you’re always painting in HD which then procedurally gets mapped to the indexed palette.
For every color ramp you define your source data is 8-bit allowing for a possible 256 colors, with no limit on the number of ramps you define. Typically when dealing with pixel art you’d map that to 32 colors or less.
What’s most important though is the indexing is non-destructive. All of the high resolution detail is retained allowing you to do things that no other index painting tool allows, essentially making this the most powerful “pure” pixel art tool in existence.
You can download the PSD used to create the following gifs HERE.
So what can it do?
Pixel-bush, AA-brush, Soft-brush

Procedural Dithering

Dither Sampling

Dither Patterns

Smudge

Gradient

AA transforms
![]()
Alpha-blending

Blend Modes

Fixed index Adjustments

Dynamic index Adjustments

Dynamic re-indexing

Setup
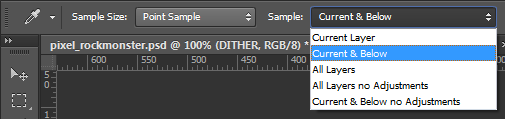
First, make sure your eyedropper tool is set to sample “current and below.” This is essential if you plan to paint with colors sampled from the canvas, as we’ll be adding a whole bunch of layers stacked on top of the paint layer which will alter the colors you’ll want to paint with. If Photoshop doesn’t support this, you may need to pick by changing the value slider.

Second, define your dither patterns. These can be anything — get creative! Create a new pattern by painting it in black and white in a square (usually no larger than 16×16 pixels), then select the square and go to Edit > Define Pattern. It will be added to your pattern list.
You can download my basic dither pattern set here.
That’s pretty much all the settings you need to change.
Basic Layer Stack

This is where the magic happens. The process relies on a stack of adjustment layers clipped to a paint layer.
To clip layers, hold ALT/OPTION between two layers in the Layers palette and click.
Layer breakdown:
-
Paint layer
The actual painting layer. Paint in 24-bit grayscale — any color gets stripped and replaced via the palette defined later. You’re effectively painting indexes of a ramp. Black = first index, white = last index. The in-between values are the key to the power here. -
Dither layer (optional) + mask (optional)

Fill with a dither pattern using the Paint Bucket in “Pattern” mode. Adjust opacity or blend mode (e.g. “Overlay”) to taste. Use a mask for control over placement/intensity.
-
Black & White adjustment layer
Ensures grayscale input. Photoshop often sneaks in color gradients otherwise. -
Posterize adjustment layer
Set the number of palette colors here. Lets you add/remove colors without ruining your painting. -
Gradient Map adjustment layer
Maps grayscale values to your palette. Acts as the color definition for your indexes. Gradient changes won’t damage the paint.
Multiple Color Ramps / Transparency
- Each ramp needs its own layer stack. You can’t just switch mid-layer.
- Transparency must be handled carefully. Posterize doesn’t threshold alpha, so soft-brushing on transparent areas creates invalid pixels.
- Best practice: Define silhouettes with pixel brush first, then alpha-lock the layer.
Advanced Layer Setup
- Try adding extra paint layers for experimentation.
- Insert adjustments between layers — placement changes the effect.
- After paint: dynamic index adjustment
- Between posterize layers: fixed index adjustment
Play around!
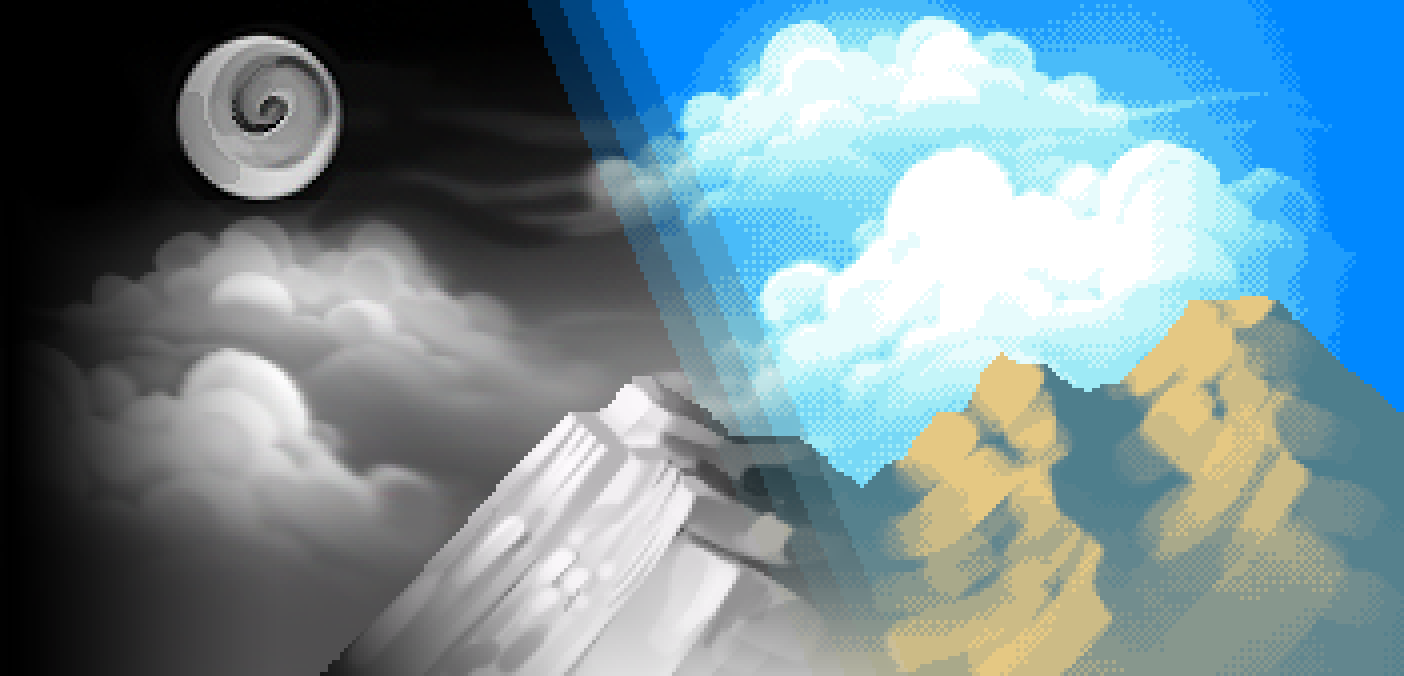
Examples
Some artwork from Chasm using this technique:


Take-Aways
Pros:
- Non-destructive: Layers let you modify palette/dither/etc. without harm.
- Always viewed as indexed: No surprises — what you see is what you get.
- Faster & efficient: Leverage powerful tools for rapid iteration.
- Great for large-scale work: Especially when using soft tools on large canvases.
Cons:
- Non-linear ramps: You can’t efficiently share colors between ramps.
- Multiple ramps: Each needs its own stack — can be cumbersome.
- Transparency handling: Needs careful setup to avoid broken pixels.
- Not ideal for small canvases: Often overkill for traditional-scale sprites.
Conclusion
This isn’t the end-all solution for pixel art — it’s just a tool. Sometimes you’ll use it, sometimes you won’t. It won’t make you a better artist, just a faster one. Decisions still need to be made at the pixel level.
But for the right project, it can dramatically improve efficiency and open new possibilities.
I hope this tutorial is helpful. Let me know your thoughts or questions — there’s a lot more I didn’t cover!